FAQ is provided to troubleshoot your problem while using TOTOLINK products.
You can enter keywords to find solution to your issue. Search by entering Keywords and selecting a product
제품 사용 중 궁금한 사항과 자주 묻는 질문에 대한 답변을 제공합니다.
키워드 검색 또는 제품 선택을 통해 관련 내용을 확인하실 수 있습니다.


| NO | Title | Updated | Download | |||
| 51 | How to establish wireless connection by WPS button? | 2019-08-30 09:54 |  |
|||
It is suitable for: EX200, EX201 Application introduction: There are two methods to extend WiFi signal by Extender, you can setup the repeater function in the web-configuration interface or by pressing the WPS button. The second one is easy and fast. Diagram
Set up steps STEP-1: * Please make sure your router has WPS button before setting. * Please confirm that your extender is in the factory state. If you are not sure, press the Reset button on the expander. STEP-2: 1.Press the WPS button on the Router. There are two types of wireless router WPS buttons: RST/WPS button and WPS button. As shown below.
Note: If router is a RST/WPS button, no more than 5s, router will be reset to factory defaults if you press it for more than 5s. 2.Press the RST/WPS button on the EX200 for about 2~3s (not more than 5s, it will reset the extender to factory default if you press it for more than 5s) within 2 minutes after pressing the button on the router.
Note: The “extending” LED will flash when connecting and become solid light when connection is successful. If the “extending” LED is off lastly, it means that the WPS connection is fail. STEP-3: When it is fail to connect to the router by the WPS button, there are two suggestions we recommend for a successful connection. 1.Place EX200 near the router and power it on, and then connect with the router by the WPS button again. When connection is finished, unplug the EX200, and then you can replace the EX200 to the desired place. 2.Try to connect to the router by setting up in the extender’s web-configuration interface, please refer to method 2 in FAQ# (How to change SSID of EX200) |
||||||
| 52 | How to log in to extender by manually configuring IP? | 2019-08-30 09:53 | |
|||
It is suitable for: EX200, EX201, EX1200M, EX1200T Set up steps STEP-1: Connect to the extender's LAN port with a network cable from a computer network port (or to search for and connect the expander's wireless signal) Note: The name of the wireless password after successful expansion is either the same as the upper level signal, or it is a custom modification of the extension process. STEP-2: Extender LAN IP address is 192.168.0.254, please type in IP address 192.168.0.x (“x” range from 2 to 254), the Subnet Mask is 255.255.255.0 and Gateway is 192.168.0.254.
Note: How to manually assign an IP address, please click the FAQ# (How to manually set an IP address) STEP-3: Open the browser,clear the address bar,enter 192.168.0.254 to the management page.
STEP-4: After the extender is successfully set up, please select Obtain an IP address automatically and Obtain DNS Server address automatically.
Note: Your terminal device must choose to obtain an IP address automatically to access the network. |
||||||
| 53 | How to set up Port Forwarding on Old User Interface? | 2019-08-30 09:53 | |
|||
It is suitable for: N100RE, N150RH, N150RT, N151RT, N200RE, N210RE, N300RT, N301RT , N300RH, N302R Plus, A702R, A850R, A3002RU Application introduction: By port forwarding, the data for Internet applications can pass through the firewall of the router or gateway. This article will show you how to forward ports on your router, take N100RE as an example. Set up steps STEP-1: In the left menu of the web interface, click Firewall ->Port Forwarding ->Enable.
STEP-2: Choose the Rule Type from the drop-down list, and then fill in the blank as below, and then click Apply. --IP Address: IP address of the server --Internal Port: Actual port of the server --External Portnternal Port: Port to access the server --Remote IP Address: Suggested blank --Comment: Set a name for rule (e.g. totolink)
STEP-3: Ensure that the port successfully added to the Current Port Forwarding List.
The router's port forwarding settings are complete Here with FTP server as an example (WIN10), check that the port forwarding is successfully. 1.Open the Control Panel\All Control Panel Items\Administrative Tools\Add FTP Server
2.Input the ftp site name, Select the path; Click next
3.Select the target PC address,Sets the port, Click Next;
4.Define users and permissions, Click Finish.
5.Now, you can access FTP over a LAN, Login Address: ftp://192.168.0.242;
6.Check ROUTER WAN IP, in the public network use it to log into the FTP Server;
Normal visit, verify that the port forwarding OK |
||||||
| 54 | How to set up Port Forwarding on New User Interface? | 2019-08-30 09:51 | |
|||
It is suitable for: N100RE, N150RT , N200RE, N210RE, N300RT, N302R Plus, A3002RU Application introduction: By port forwarding, the data for Internet applications can pass through the firewall of the router or gateway. This article will show you how to forward ports on your router, take N100RE as an example. Set up steps STEP-1: In the left menu of the web interface, click Firewall ->Virtual Server ->Add.
STEP-2: Choose the Rule Type from the drop-down list, and then fill in the blank as below, and then click Apply. --Service Type: Click View Existing Servics --External Port: Port to access the server --Internal Port: Actual port of the server --Protocol: IP address of the server --Service Type: Selectable by TCP, UDP, ALL
STEP-3: Ensure that the port successfully added to the Current Port Forwarding List.
The router's port forwarding settings are complete Here with FTP server as an example (WIN10), check that the port forwarding is successfully. 1.Open the Control Panel\All Control Panel Items\Administrative Tools\Add FTP Server
2.Input the ftp site name, Select the path; Click next
3.Select the target PC address,Sets the port, Click Next;
4.Define users and permissions, Click Finish.
5.Now, you can access FTP over a LAN, Login Address:ftp://192.168.0.242;
6.Check ROUTER WAN IP, in the public network use it to log into the FTP Server;
Normal visit, verify that the port forwarding OK |
||||||
| 55 | How to set up the remote login router web interface? | 2019-08-30 09:50 | |
|||
It is suitable for: N100RE, N150RT , N200RE, N210RE, N300RT, N302R Plus, A3002RU Application introduction: If you want to manage your router anywhere on the network, you can configure it in real time and securely. The remote WEB management function enables remote management of the router where it is connected to the Internet. Set up steps STEP-1:Login to the TOTOLINK router in your browser.
STEP-2: In the left menu, click System Status, check the WAN IP address and remember.
STEP-3: In the left menu, click Network ->WAN Settings. Select "Enable Web Server Access on WAN". Then click Apply.
[Note]: The remote WEB management port set by the router is only needed when the external network computer accesses the router. Local area network computer access router is not affected and still uses 192.168.0.1 access. STEP-4: In external network, use WIN IP address + port access, as shown below:
Q1: Can't remote login the router? 1.The service provider shields the corresponding port; Some broadband service providers may block common ports such as 80, resulting in inaccessibility of the router interface. It is recommended to set the WEB management port to 9000 or higher. The external network user uses the set port to access the router. 2.WAN IP must be the public IP address; The computer in the LAN accesses http://www.apnic.net. If the IP address is different from the IP address of the router's WAN port, the IP address of the WAN port is not the public IP address, which prevents the external network user from directly accessing the router interface. It is recommended to contact the broadband service provider to solve the problem. 3.WAN IP address has changed. When the Internet access mode of the WAN port is dynamic IP or PPPoE, the IP address of the WAN port is not fixed. When using the external network access, you need to confirm the IP address of the router WAN port. |
||||||
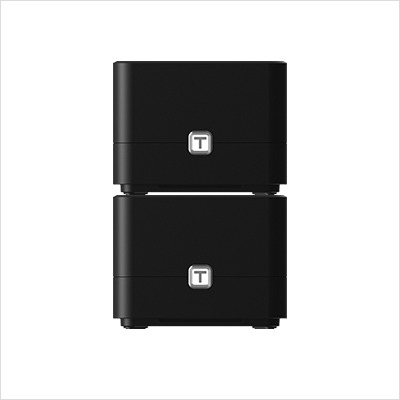
| 56 | T10 Reset settings | 2019-08-30 09:46 | |
|||
when the router is powered on, press T button and hold it for 5 seconds until the state LED blinks red, release T button. The device will restore to factory default settings. RST button diagram:
System LED diagram:
|
||||||
| 57 | How to export the router's system log by E-mail? | 2019-08-30 09:44 | |
|||
The system log of the router can be used to find out why the network connection fails. Take A1004 as an example:
STEP-1: Login to the TOTOLINK router in your browser. STEP-2: Confirm that your router is connected to internet. STEP-3: In the left menu, click System ->System Log. STEP-4: Admin E-mail Setup. ①Enter Recipient E-mail, E.g: fae@zioncom.net ②Enter Recipient Server,E.g: smtp.zioncom.net ③Enter E-mail of sender ④Enter E-mail and Password of sender ⑤Click "Apply" STEP-5: Send E-mail immediately. Note: Before sending the E-mail, you need to confirm that the router is connected to the internet. |
||||||
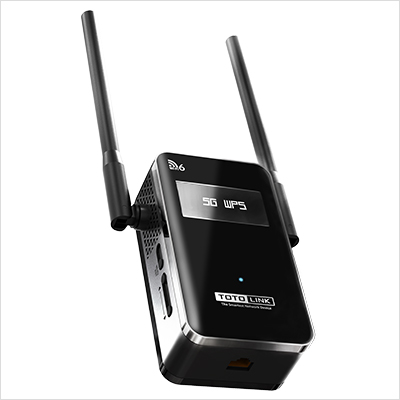
| 58 | EX200 Reset settings | 2019-08-30 09:44 | |
|||
Diagram
Set up steps Keep the extender power on, use a pin to press the RST button on the bottom of device. When System LED blink, release the button. The device will restore to factory default settings. RST button diagram:
System LED diagram:
FAQs Q1:Unable to login the management page when I want to configure the extender to repeat other router's signal, how to do? Reset the extender and then login the default gateway to configure the extender again. Q2:LED indicator introduction:
|
||||||
| 59 | How to properly download installation driver of adapter? | 2019-08-29 18:15 | |
|||
It is suitable for: All TOTOLINK adapters Diagram
Preparation ★ Before downloading files. please confirm the hardware version ofyour device and choose the corresponiding driver version Set up steps STEP-1: Guide for Hardware Version For most TOTOLINK adapter, you can see a bar coded stickers at the front of the device, the character string started with Model No.(for example N150UA) and ended with Hardware Version (for example V5.0) is the serial number of your device. See below:
STEP-2: Open browser, enter www.totolink.net Download the required files. For example, if your hardware yersion is V5.0 , please download V5 version. Note: If the hardware version is V1, V1 will be hidden.
STEP-3: Unzip the file, click to install the driver.
STEP-4: Please waiting for a few seconds.
STEP-5: Click"Finish", the driver program is installed successfully.
|
||||||
| 60 | How to properly download upgrade firmware of extender? | 2019-08-29 18:14 | |
|||
Preparation ★ Before downloading files. please confirm the hardware version ofyour device and choose the corresponiding firmware version to uparade. ★ Wrong firrmware version may damage your device and no warrante. Set up steps STEP-1: Guide for Hardware Version For most TOTOLINK extender, you can see two bar coded stickers at the front of the device, the character string started with Model No.(for example EX200) and ended with Hardware Version (for example V1.0) is the serial number of your device. See below:
STEP-2: Open browser, enter www.totolink.net Download the required files. For example, if your hardware yersion is V1.0 , please download V1 version. Note: If the hardware version is V1, V1 will be hidden.
STEP-3: Unzip the file, correct upgrade file name is suffixed with ”web” or “bin” (except for some special models)
|
||||||


