FAQ is provided to troubleshoot your problem while using TOTOLINK products.
You can enter keywords to find solution to your issue. Search by entering Keywords and selecting a product
제품 사용 중 궁금한 사항과 자주 묻는 질문에 대한 답변을 제공합니다.
키워드 검색 또는 제품 선택을 통해 관련 내용을 확인하실 수 있습니다.


| NO | Title | Updated | Download | ||||||||||||||||||||||
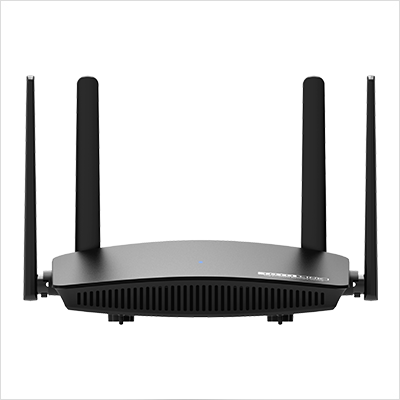
| 21 | A720R Quick Installation Guide | 2020-08-27 17:26 |  |
||||||||||||||||||||||
STEP-1: Activate the WLAN function on your Phone and connect to TOTOLINK_A720R or TOTOLINK_A720R_5G . Then run any Web browser and enter http://itotolink.net in the address bar.
STEP-2: Enter admin for the password and then click LOGIN.
STEP-3: Click Quick Setup.
STEP-4: Time Zone setting. According to your location, please click the Time Zone to choose a correct one from the list, then click Next.
STEP-5: Internet Setting. Choose a suitable connection type from the list and fill in the information required, then click Next.
STEP-6: Wireless Setting. Create passwords for 2.4G and 5G Wi-Fi (Here users could also revise the default Wi-Fi name) and then click Next.
STEP-7: For security, please create a new Login Password for your router, then click Next.
STEP-8: The coming page is the Summary information for your setting. Please remember your Wi-Fi Name and Password, then click Done.
STEP-9: It takes several seconds to save the settings and then your router will restart automatically. This time your Phone will be disconnected from the router. Please back to the WLAN list of your phone to choose the new Wi-Fi name and input the correct password. Now, you could enjoy the Wi-Fi.
STEP-10: More features: Click Application.
STEP-11: More features: Click Tools.
STEP-12: More features: Click PC.
STEP-1: Connect your computer to the router by cable or wireless. Then run any Web browser and enter http://itotolink.net in the address bar. STEP-2: Enter admin for the password and then click LOGIN.
STEP-3: Click Quick Setup.
|
|||||||||||||||||||||||||
| 22 | A650UA Quick Installation Guide | 2020-08-27 17:43 | |
||||||||||||||||||||||
STEP-1: Guide for Hardware Version For most TOTOLINK adapter, you can see a bar coded stickers at the front of the device, the character string started with Model No.(for example A650UA) and ended with Hardware Version (for example V1.0) is the serial number of your device. See below:
STEP-2: After hardware installation, you will see below window showing automatically. Click Run RTLautoInstallSetup.exe. Note: if the window not pop up, please refer to FAQ 1.
STEP-3: Wait for a few seconds.The window will close up when the initialization complete .
STEP-4: Click icon on the bottom right of the computer desktop.Choose your Wireless network name,click Connect automatically and then Connect.
1. What to do if the auto run CD Drive window not pop up? Please go to Computer/This PC and double-click CD Drive disk, see below:
2. How to put the antenna of A650UA to get best Wi-Fi signal? In order to get best Wi-Fi in your house, we suggest you to keep the antenna. perpendicular to the horizontal plane.
|
|||||||||||||||||||||||||
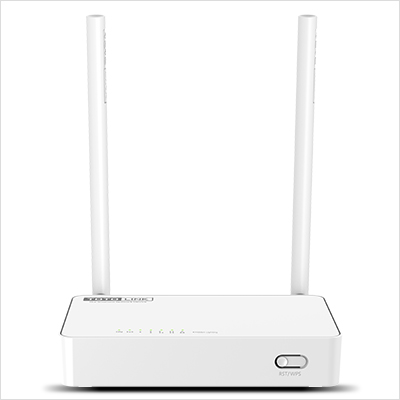
| 23 | A702R Quick Installation Guide | 2020-08-27 17:54 | |
||||||||||||||||||||||
STEP-1: Find TOTOLINK_A702R or TOTOLINK_A702R_5G on the WLAN list of your Phone, and choose to connect. Then any Web browser on your Phone and enter http://itotolink.net on the address bar.
STEP-2: Input admin for both User Name and Password on the coming page, then click Login.
STEP-3: Click Quick Setup on the coming page.
STEP-4: Internet Setting. Choose a suitable WAN Connection type from the list, and fill in the information required.
STEP-5: Wireless Setting. Create passwords for 2.4G and 5G Wi-Fi (Here users could also revise the default Wi-Fi name) and then click Next.
STEP-6: It takes several seconds to save the settings and then your router will restart automatically. This time your Phone will be disconnected from the router. Please back to the WLAN list of your phone to choose the new Wi-Fi name and input the correct password. Now, you could enjoy the Wi-Fi.
STEP-1: Connect your computer to the router by cable or wireless. Then run any Web browser and enter http://itotolink.net in the address bar. STEP-2: Set a new login password for the device, it is recommended to set the password with alphanumeric characters and then press Install.
STEP-3: Enter admin for User name, then enter new password in step 2 or admin, type the verification code then press LOGIN.
STEP-4: Click on "Auto Detect" to detect the Wan Type in your network.
STEP-5: Now you can see the Easy Setup page. All basic settings could be done here, including Internet Settings and Wireless Settings.
|
|||||||||||||||||||||||||
| 24 | A3002RU TR069 Configuration | 2020-08-27 18:13 | |
||||||||||||||||||||||
Application introduction: This tutorial will show you how to configure TR069 feature on TOTOLINK Router devices. STEP-1: Install router as the following diagram The router WAN IP and TR069 server IP must be on the same network segment or can access each other; TR069 server needs to turn off the firewall and other functions.
STEP-2: Login router Access Login page (Default IP: 192.168.0.1) and then you need enter the Administrator information (Default ID and Password is admin).
STEP-3: WAN settings Go to the Advanced Setting page, setup the WAN information.
STEP-4: TR069 settings Next, setup the TR069 information.
R069 – Connection Information
|
|||||||||||||||||||||||||
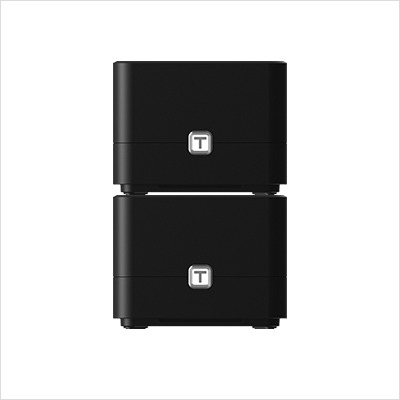
| 25 | T10 Quick Setup Guide | 2020-08-26 18:37 | |
||||||||||||||||||||||
Package Contents •1 T10 Master •2 T10 Satellites •3 Power Adapters •3 Ethernet Cables Steps 1.Remove the power cord from your modem. Wait 2 minutes. 2.Insert an ethernet cable into your modem. 3.Connect ethernet cable from modem into the yellow WAN port of the T10 labeled Master. 4.Power on your modem and wait until it is fully booted. 5.Power on the Master and wait until status LED is blinking green. 6.Connect to the Master’s SSID labeled TOTOLINK_XXXXXX or TOTOLINK_XXXXXX_5G. 7.Once successfully connected to the Master and able to access the Internet, please change the SSID and password to that of your choosing for security reasons. Then you can position the 2 sateIIites throughout your home. Note: The color of the sateIIite’s status LED acts as a signal strength indicator. Green/Orange = Excellent or OK signal Red = Poor signal, needs to be moved closer to the Master. FAQs How to set my own SSID and Password? 1.Connect to the Master using a wired or wireless connection. 2.Open a web browser and enter http://192.168.0.1 into the address bar. 3.Enter User Name and Password and click Login. Both are admin by default in lowercase letters. 4.Enter your new SSID and Password within the Easy Setup Page for both 2.4Ghz and 5Ghz bands. Then click AppIy. Note: The default access address is located on the bottom of each unit. However, this may vary de-pending on your network configuration. In most cases, if this address does not work you may try the alternate address 192.168.1.1. Also, check your Wi-Fi settings to make sure you are connected to the router you are trying to configure. For questions or additionaI assistance in setting up your T10 WhoIe Home Wi-Fi Mesh System, pIease contact us at fae@zioncom.net |
|||||||||||||||||||||||||
| 26 | How to set up static DHCP | 2020-08-26 18:43 | |
||||||||||||||||||||||
STEP-1: Connect your computer Connect your computer to the router by cable or wireless, then login the router by entering http://192.168.0.1 into the address bar of your browser.
Note: The default access address varies depending on the actual situation. Please find it on the bottom label of the product. STEP-2: User Name and Password are required, by default both are admin in lowercase letter. Click LOGIN.
STEP-3: Enter advanced settings to select the LAN settings in Network,click the Set Static DHCP.
STEP-4: Checklist the Enable Static DHCP to open the setting,input IP Address ,MAC Address and Comment.After click Apply ,we can see the information in the static DHCP List.
|
|||||||||||||||||||||||||
| 27 | How to set up static DHCP | 2020-08-26 18:41 | |
||||||||||||||||||||||
STEP-1: Connect your computer Connect your computer to the router by cable or wireless, then login the router by entering http://192.168.0.1 into the address bar of your browser.
Note: The default access address varies depending on the actual situation. Please find it on the bottom label of the product. STEP-2: User Name and Password are required, by default both are admin in lowercase letter. Click LOGIN.
STEP-3: Select advanced settings to enter the settings page
STEP-4: Enter the Static DHCP Setting to open the setting and checklist the Enable,input IP Address ,MAC Address and Comment.After click Apply ,we can see the information in the static DHCP List.
|
|||||||||||||||||||||||||
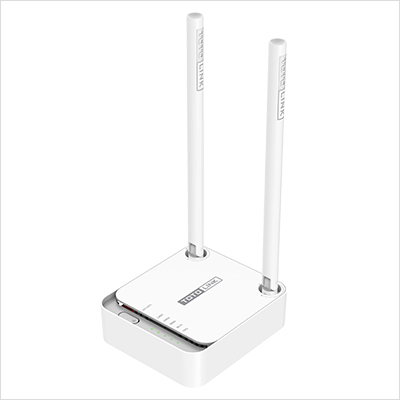
| 28 | N200RE-V5 Quick Installation Guide | 2020-04-29 12:57 | |
||||||||||||||||||||||
STEP-1: Activate the WLAN function on your Phone and connect to TOTOLINK_N200RE. Then run any Web browser and enter http://itotolink.net in the address bar.
STEP-2: Enter admin for the password and then click LOGIN.
STEP-3: Click Quick Setup.
STEP-4: Time Zone setting. According to your location, please click the Time Zone to choose a correct one from the list, then click Next.
STEP-5: Internet Setting. Choose a suitable connection type from the list and fill in the information required, then click Next.
STEP-6: Wireless Setting. Create passwords for 2.4G and 5G Wi-Fi (Here users could also revise the default Wi-Fi name) and then click Next.
STEP-7: For security, please create a new Login Password for your router, then click Next.
STEP-8: The coming page is the Summary information for your setting. Please remember your Wi-Fi Name and Password, then click Done.
STEP-9: It takes several seconds to save the settings and then your router will restart automatically. This time your Phone will be disconnected from the router. Please back to the WLAN list of your phone to choose the new Wi-Fi name and input the correct password. Now, you could enjoy the Wi-Fi.
STEP-10: More features: Click Application.
STEP-11: More features: Click Tools.
STEP-1: Connect your computer to the router by cable or wireless. Then run any Web browser and enter http://itotolink.net in the address bar. STEP-2: Enter admin for the password and then click LOGIN.
STEP-3: Click Quick Setup.
|
|||||||||||||||||||||||||
| 29 | How to set up static DHCP? | 2020-04-29 12:38 | |
||||||||||||||||||||||
STEP-1: Connect your computer Connect your computer to the router by cable or wireless, then login the router by entering http://192.168.0.1 into the address bar of your browser.
Note: The default access address varies depending on the actual situation. Please find it on the bottom label of the product. STEP-2: User Name and Password are required, by default both are admin in lowercase letter. Click LOGIN.
STEP-3: Enter advanced settings to select the LAN settings in Network,click the Set Static DHCP.
STEP-4: Checklist the Enable Static DHCP to open the setting,input IP Address ,MAC Address and Comment.After click Apply ,we can see the information in the static DHCP List.
|
|||||||||||||||||||||||||
| 30 | How to Select Operation Mode of CPE Products | 2020-08-27 17:41 | |
||||||||||||||||||||||
Application introduction: This document describes the characteristics and application scenarios of different modes supported by TOTOLINK CPE, including Client mode, Repeater mode, AP mode and WISP mode.
STEP-1: Client mode Client mode is used to transfer wireless connection into wired connection. In Client mode, the device serves as a wireless adapter. It receives the wireless signal from root AP or station, and provides wired network for users. Scenario 1:
Scenario 2:
STEP-2: Repeater mode Repeater Mode In this mode,you can extend the superior Wi-Fi signal by Repeater setting function under the Wireless column to increase the coverage of the wireless signal. Scenario 1:
Scenario 2:
STEP-3: AP mode AP mode connect the superior AP/Router by wire, you can transfer the superior's AP/Router wired signal into wireless signal. Scenario 1:
Scenario 2:
Scenario 3:
Scenario 4:
STEP-4: WISP Mode WISP Mode In this mode, all ethernet ports are bridged together and the wireless client will connect to ISP access point. The NAT is enabled and PCs in ethernet ports share the same IP to ISP through wireless LAN. Scenario 1:
FAQ Common problem Q1: How to reset the CPE to factory default Settings? Keep the CPE powered on, press the RESET button on CPE or Passive PoE box about 8 seconds, the CPE will restore to factory default settings.
Q2: What Can I do If I forgot the CPE’s Web Login User Name and Password? In case you changed your CPE’s Login User Name and Password, we suggest you reset your CPE to factory default settings by above operations. Then use the following parameters to login the CPE’s Web interface: Default IP address: 192.168.1.1 User Name: admin Password: admin |
|||||||||||||||||||||||||


