FAQ is provided to troubleshoot your problem while using TOTOLINK products.
You can enter keywords to find solution to your issue. Search by entering Keywords and selecting a product
제품 사용 중 궁금한 사항과 자주 묻는 질문에 대한 답변을 제공합니다.
키워드 검색 또는 제품 선택을 통해 관련 내용을 확인하실 수 있습니다.


| NO | Title | Updated | Download | |||||||||||
| 71 | How to set up DDNS on TOTOLINK Router? | 2019-08-29 18:01 |  |
|||||||||||
Application introduction: DDNS (Dynamic Domain Name System) is useful for your own website, FTP server or other server behind the router. STEP-1: Connect your computer to the router by cable or wireless, then login the router by entering http://192.168.0.1 into the address bar of your browser.
Note: The default access address varies depending on the actual situation. Please find it on the bottom label of the product. STEP-2: User Name and Password are required, by default both are admin in lowercase letter. Click LOGIN.
STEP-3: Enter the Advanced Setup page of the router, Click Managemet->DDNS on the navigation bar on the left.
STEP-4: Enter the Service Provider, Domain Name, User Name and Password in the blank space, and then click Apply to apply the modification.
|
||||||||||||||
| 72 | How to set up the router to work as a AP mode? | 2019-08-29 18:00 | |
|||||||||||
Application introduction AP mode,connect the superior AP/Router by wire, you can bridge the superior's AP/Router wired signal into wireless Wi-Fi signals for Wi-Fi devices. Here we take A3002RU for demonstration. Note: Confirm that your wired network can share the Internet.
STEP-1: Connect your computer to the router by cable or wireless, then login the router by entering http://192.168.0.1 into the address bar of your browser.
Note:The default access address varies depending on the actual situation. Please find it on the bottom label of the product. STEP-2: User Name and Password are required, by default both are admin in lowercase letter. Click LOGIN.
STEP-3: Enter the Advanced Setup page of the router, then follow the steps illustrated. ① Click Operation Mode> ② Select AP Mode-> ③ Click Apply button
STEP-4: Next set the wireless SSID and password. Finally click Connect.
STEP-5: Congratulations! Now all your Wi-Fi enabled devices can connect to the customized wireless network. Note: After the AP mode is set successfully, you cannot log in to the management page. If you need to make changes, please Reset the router. |
||||||||||||||
| 73 | How to set up the router to work as a AP mode? | 2019-08-29 17:59 | |
|||||||||||
Application introduction AP mode,connect the superior AP/Router by wire, you can bridge the superior's AP/Router wired signal into wireless Wi-Fi signals for Wi-Fi devices. Here we take A3000RU for demonstration. Note: Confirm that your wired network can share the Internet.
STEP-1: Connect your computer to the router by cable or wireless, then login the router by entering http://192.168.0.1 into the address bar of your browser.
Note:The default access address varies depending on the actual situation. Please find it on the bottom label of the product. STEP-2: User Name and Password are required, by default both are admin in lowercase letter. Click LOGIN.
STEP-3: You need to enter the settings page of the router, then follow the steps illustrated. ① Set 2.4G network -> ②Set 5G network -> ③Click the Apply button
STEP-4: Enter the Advanced Setup page of the router, then follow the steps illustrated. ① Click Operation Mode> ② Select Bridge Mode-> ③ Click Apply button
STEP-5: Congratulations! Now all your Wi-Fi enabled devices can connect to the customized wireless network. Note: After the AP mode is set successfully, you cannot log in to the management page. If you need to make changes, please Reset the router. |
||||||||||||||
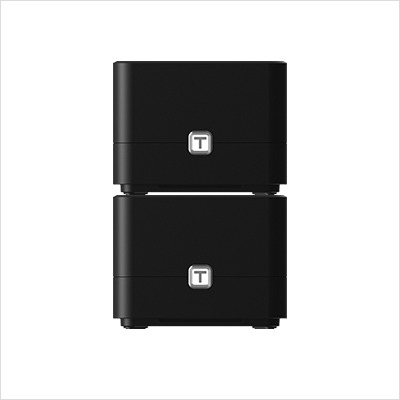
| 74 | How to Create Your Whole Home Wi-Fi Network on T10 | 2019-08-29 17:56 | |
|||||||||||
Application introduction T10 uses several units working together to create seamless Wi-Fi in each of your rooms.
★ Connect the Master to the Internet and configure its SSID and password. ★ Ensure that these two Satellites are in factory defaults. If not or uncertain, reset them by pressing and holding the panel T button for five seconds. ★ Place all the Satellites near the Master, and ensure that the distance, between the Master and Satellite is limited to one meter. ★ Check that all the routers above are applied power.
STEP-1: Press and hold the panel T button on the Master for about 3 seconds until its state LED blinks between red and orange.
STEP-2: Wait until the state LEDs on the two Satellites also blink between red and orange. It may take about 30 seconds. STEP-3: Wait about 1 minute for the state LEDs on the Master to blink green and on the Satellites solid green. In this case, it means the Master is synced to the Satellites successfully. STEP-4: Adjust the position of the three routers. As you move them, check that the state LEDs on the Satellites light solid green or orange until you find a good location.
STEP-5: Use your device to find and connect to any router’s wireless network with the same SSID and Wi-Fi password that you use for the Master. STEP-6: If you want to view which Satellites are Synced to the Master, log in to the Master via a web browser, and then go to the Mesh Networking Information area by choosing Advanced Setup > System Status.
STEP-1: Enter the master’s configuration page 192.168.0.1 and Select “Advanced Setting”
STEP-2: Choose Operation Mode > Mesh Mode, and then click the Next button.
STEP-3: In the Mesh list, select Enable to start sync between the Master and the Satellites.
STEP-4: Wait 1-2 minutes and watch the LED light. It will react just the same as what’s among T-button connection. Visiting 192.168.0.1, you may check the connection status.
STEP-5: Adjust the position of the three routers. As you move them, check that the state LEDs on the Satellites light solid green or orange until you find a good location.
|
||||||||||||||
| 75 | A3002RU Samba server instal | 2018-12-21 10:27 | |
|||||||||||
How to access A3002RU USB shared U disk video, pictures? Application introduction A3002RU support file sharing function, the mobile storage devices (such as U disk, mobile hard disk, etc.) connected to the router's USB interface, LAN terminal equipment can access the resources of mobile storage devices, easy file sharing.
STEP-1: Stores the resource you want to share with others into the USB flash disk or hard drive before you plug it into the USB port of the router. STEP-2: 2-1. Connect your computer to the router by cable or wireless, then login the router by entering http://192.168.0.1 into the address bar of your browser.
Note: The default access address varies depending on the actual situation. Please find it on the bottom label of the product. 2-2. User Name and Password are required, by default both are admin in lowercase letter. Click LOGIN.
STEP-3: Enable the SAMBA Server. Set the SAMBA Server account password .
STEP-4: Access the Samba server from the client. 4-1. Open This PC and type \\192.168.0.1 in the input box. And press the Enter key
4-2. Enter the User name and password that you have set before, and then click OK.
4-3. On this page, you will see the attached hard disk information. Click on this hard drive.
4-4. you can and good friends to share the resources inside the hard disk. Notes: If the Samba server can’t take effect immediately, please wait a few minutes. Or restart the service by clicking stop/start button. |
||||||||||||||
| 76 | How do I get the login address of my router? | 2018-11-27 11:12 | |
|||||||||||
Check the label on the bottom of the router to get the login address of the router, as shown below.
Obtain the login address of the router through the computer (take win10 system as an example). STEP-1: The computer connects to the wireless signal of the router. (The back sticker has the factory default wireless signal name) STEP-2: 2-1. Click on wireless icon at the bottom right corner on the screen, Select Network & Internet settings.
2-2. Select the connected wireless network.
2-3. Select Details to check whether an IP address is obtained.
If the IPV4 address is 192.168.0.*, the default gateway of IPV4 is 192.168.0.1, indicating that the login address of the router is 192.168.0.1. If the IPV4 address is 192.168.1.*, the default gateway of IPV4 is 192.168.1.1, indicating that the login address of the router is 192.168.1.1. If the IP is not available, you can disconnect the signal and reconnect it. If it is still invalid, you can restore the router to the factory and check the IP address obtained after the connection signal. Note: Before this, please confirm that your computer is selected to "acquire IP address automatically". For the setting method of the computer automatically obtaining the IP address, refer to the following figure (take win10 system as an example).
Obtain the login address of the router through your mobile phone. STEP-1 The wireless signal that the phone connects to the router. (The back sticker has the factory default wireless signal name) STEP-2: Select your phone's wireless network settings to check if you have an IP address.
At this point, the IPV4 address is 192.168.0.*, and the IPV4 default gateway is 192.168.0.1, indicating that the router's login address is 192.168.0.1. STEP-3: Enter 192.168.0.1 in the address bar of the mobile browser.
STEP-4: If you still can't enter, you can change the browser or a mobile phone or computer through the 192.168.0.1 login interface. STEP-5: If the fourth step is invalid, the router can be reset. Reset method: 1. Please make sure your router’s power is on regularly, then press the RST button for about 10s.(The RESET pin should be held with a pointed object such as a paper clip or a pen tip) 2. Loosen the button until your router’s LED lights all flashing, then you have reset your router to default settings. |
||||||||||||||
| 77 | What if I cannot log into the router's setup page? | 2018-11-26 17:49 | |
|||||||||||
If you can’t login the web interface of TOTOLINK, it may be related to factors such as router, line, browser or computer. Please follow the steps below for detailed troubleshooting. Application introduction: After entering the management address of the router in the address bar of the browser, the management page cannot be displayed, or the page cannot be displayed after entering the management password, as shown below. Note: Ensure that the login IP address you typed in the address bar is correct, as well as the login username and password.
STEP-1: Check line connection The operating computer should be connected to the router and can be connected via a network cable or wirelessly. Connect through the network cable: Operate the computer and connect to the LAN port of the router, and ensure that the indicator of the computer network cable interface and the corresponding interface of the router is on. Wireless connection: The wireless terminal needs to connect to the router signal. When the factory setting is set, the router default Wi-Fi name and password are printed on the bottom label of the router. Note: If the signal of the wireless router is not found, it is recommended to reset the router. STEP-2: Check computer IP address If the computer does not specify or obtain the correct IP address, it will be unable to log in to the management interface. Be sure to set the IP address of the operating computer to be automatically obtained. Take the Windows 10 system wired network card as an example. For the setting method of the computer automatically obtaining the IP address, refer to the following figure.
STEP-3: Check login address TOTOLINK router currently has three types of login addresses, and different router addresses may be different: Management page address: itotolink.net or 192.168.0.1 or 192.168.1.1. For the specific login address, please check the sticker at the bottom of the router, as shown below (take itotolink.net as an example).
After confirming the login address, open the browser, clear the address bar and enter the management address, press Enter, as shown below.
STEP-4: Check login password If the password input box of the login management interface can be displayed, but the wrong password is entered, the management interface cannot be logged. Our common default login password prompt box, as shown below.
Note: If you forget the set or modified management password, you can only restore the factory settings. STEP-5: Change your browser or computer A. Change browser and clear browser cache Try changing your browsers like Google Chrome, Firefox, Internet Explorer, etc., and clear your browser cache. Delete cookies on the web browser. Here we take Google Chrome for example. Note: In general, the browser enters the management address of the router and a 404 error pops up. Please use this method first.
B. Try to log in with your phone If you are unable to log in using your computer, you can try to change another computer or use your mobile phone to log in to the management interface (using the mobile browser), as shown below, enter itotolink.net as an example.
STEP-6: Reset router If you still cannot log into the router's setup page after troubleshooting according to the above methods, it is recommended to restore the factory settings. There are two types of wireless router reset buttons: RESET pin and RESET button. As shown below.
Reset method: 1. Please make sure your router’s power is on regularly, then press the RST button for about 10s.(The RESET pin should be held with a pointed object such as a paper clip or a pen tip) 2. Loosen the button until your router’s LED lights all flashing, then you have reset your router to default settings. Note: Some wireless routers share a button with RESET. |
||||||||||||||
| 78 | How to Configure the AP Mode on the EX1200M | 2018-11-26 17:51 | |
|||||||||||
Application introduction: To set up a Wi-Fi network from an existing wired (Ethernet) network so that multiple devices can share the Internet. Here takes EX1200M as demonstration.
STEP-1:Configure the extension ※ Please reset the extender first by pressing the reset button/hole on the extender. ※ Connect your computer to the extender wireless network.
Note: 1.The default Wi-Fi Name and Password are printed on the Wi-Fi Info Card to connect to theextender. 2.Do not connect the extender to the wired network until the AP mode is set. STEP-2:Login to the management page Open the browser, clear the address bar, enter 192.168.0.254 to the management page, Then check Setup Tool.
STEP-3:AP mode setting AP mode supports both 2.4G and 5G. The following describes how to set up 2.4G first, then set 5G: 3-1. 2.4GHz Extender Setup Click ① Basic Setup,->② 2.4GHz Extender Setup->Select ③ AP mode, ④ setting the SSID ⑤ setting password, If you need to see the password, ⑥ check Show, Finally ⑦ click Apply.
After the setup is successful, the wireless will be interrupted and you need to reconnect to the Extender's wireless SSID. 3-2. 5GHz Extender Setup Click ① Basic Setup,->② 5GHz Extender Setup->Select ③ AP mode, ④ setting the SSID ⑤ setting password, If you need to see the password, ⑥ check Show, Finally ⑦ click Apply.
STEP-4: Connect the extender to the wired network through the network cable as shown below.
STEP-5: Congratulations! Now all your Wi-Fi enabled devices can connect to the customized wireless network. |
||||||||||||||
| 79 | A3000RU Samba server instal | 2018-11-26 17:51 | |
|||||||||||
Application introduction: A3000RU support file sharing function, the mobile storage devices (such as U disk, mobile hard disk, etc.) connected to the router's USB interface, LAN terminal equipment can access the resources of mobile storage devices, easy file sharing.
STEP-1: Stores the resource you want to share with others into the USB flash disk or hard drive before you plug it into the USB port of the router. STEP-2: 2-1. Connect your computer to the router by cable or wireless, then login the router by entering http://192.168.0.1 into the address bar of your browser.
Note: The default access address varies depending on the actual situation. Please find it on the bottom label of the product. 2-2. User Name and Password are required, by default both are admin in lowercase letter. Click LOGIN.
STEP-3: Enable the SAMBA Server. Default account password samba.
STEP-4: Access the Samba server from the client. 4-1. Open This PC and type \\192.168.0.1 in the input box. And press the Enter key
4-2. In this page will pop up a certification box, enter the default name and password that you have set before, and then click OK.
4-3. On this page, you will see the attached hard disk information. Click on this hard drive.
4-4. you can and good friends to share the resources inside the hard disk. Notes: If the Samba server can’t take effect immediately, please wait a few minutes. Or restart the service by clicking stop/start button. |
||||||||||||||
| 80 | How to change SSID of EX200 | 2018-11-26 17:52 | |
|||||||||||
Application introduction: The wireless extender is a repeater (Wi-Fi signal amplifier), which relays a WiFi signal, expands the original wireless signal, and extends the WiFi signal to other places where there is no wireless coverage or where the signal is weak.
STEP-1:Configure the extension *Please reset the extender first by pressing the reset button/hole on the extender. *Connect to the extender's LAN port with a network cable from a computer network port (or to search for and connect the expander's wireless signal) Note: The default Wi-Fi Name and Password are printed on the Wi-Fi Info Card to connect to theextender. STEP-2:Login to the management page Open the browser, clear the address bar, enter 192.168.0.254 to the management page, Then check Repeater Setting.
STEP-3:View or modify the wireless parameters Click ❶Show,->❷Choose your router’s 2.4GHz SSID->❸Enter your router’s wireless password, ❹Change the SSID and password for extended 2.4GHz wireless network, ❺click Connet.
STEP-4:Extender position display Move the Extender to a different location for a best Wi-Fi access. |
||||||||||||||


